New category in this blog, a little restoration tutorial with some pictures.
The DINKY TOYS #27/340 LAND ROVER (which will be the topic of some future posts) is often found with a part of the front bumper missing. The front bumper has fragile extremities and DINKY altered the design in order to strengthen it only at the very end of the production of the model.
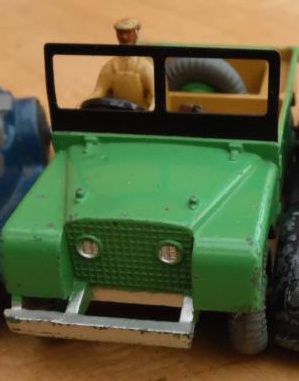
Here is a step by step tutorial to restore it quite easily. It must be noticed that the tyres of this early production model were hardened, and the restoration was done without removing them, because they would certainly have been destroyed by removal.
The materials and tools
- A paperclip or a bit of metal wire
- A few of 2-compound putty or synthetic metal
- 2 drops of cyanoacrylate glue
- Matt silver paint for model kits (Humbrol or similar)
- Tools : pliers, metal files, a Dremel-type driller with a 1mm (or a dentist diamond driller)
- And of course, a DINKY LAND ROVER !
First step : drill holes in the body
You have to drill a 1mm hole in the central part of the front bumper, an to make a recess under the front wing, which will allow to glue in the metal support.
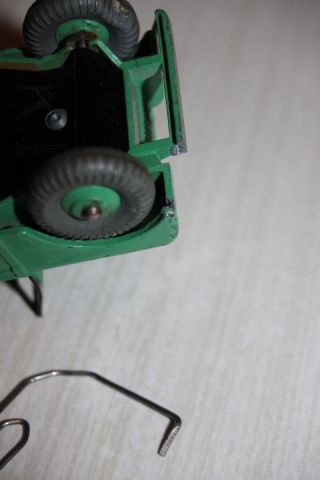
Second step : give the right shape to the metal support
You must now give the adequate shape to the paperclip. Some adjustments will certainly be needed to reach the optimal shape.
My little tip : give a square shape to the part that you will glue under the wing, by pressing it with the pince or using the file to remove some material.

Then glue it to the body and mid bumper with two drops of cyanoacrylate glue and leave it a few hours.
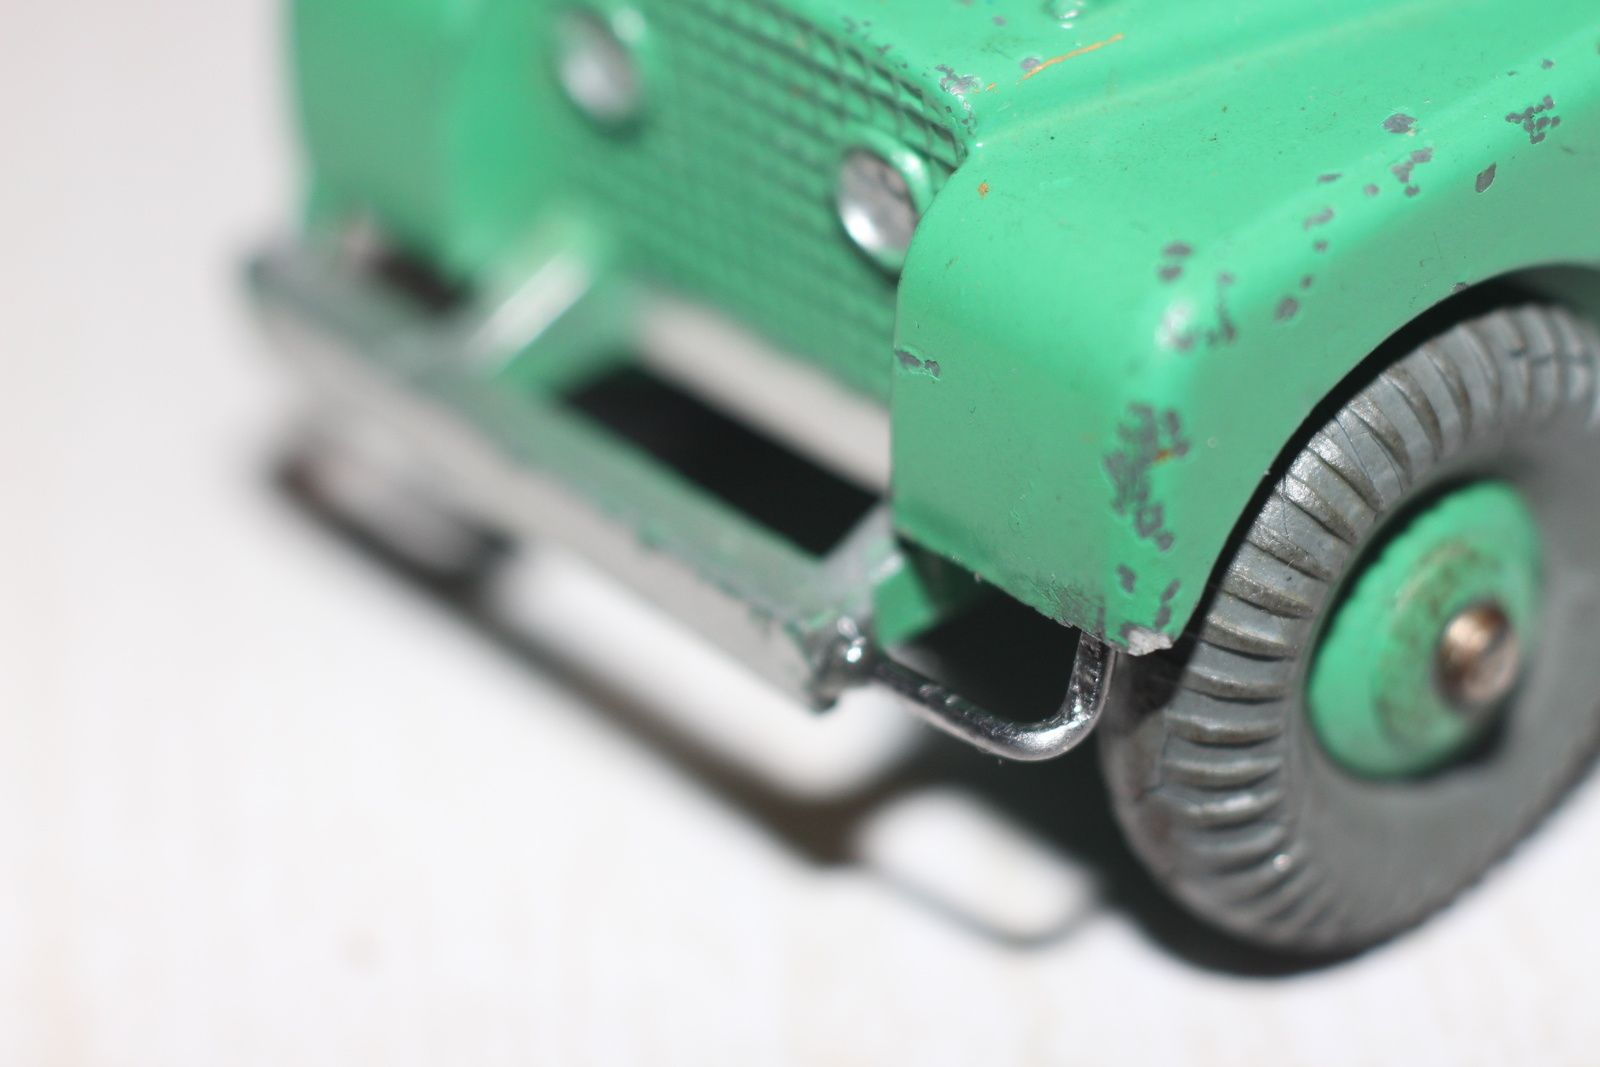
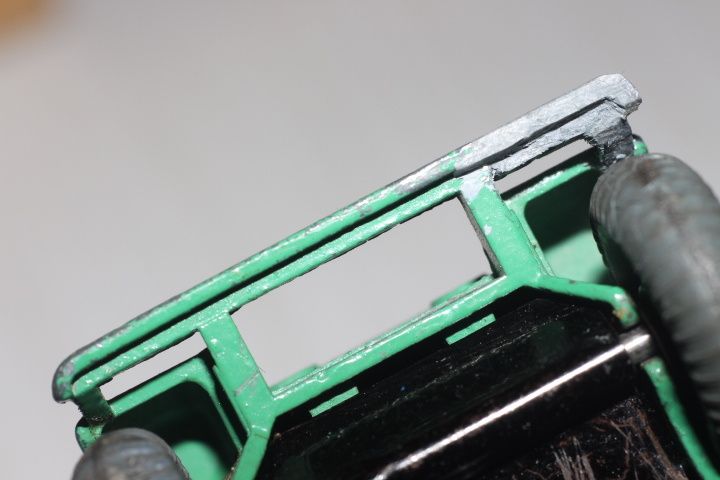
Third step : wrap the support with synthetic metal
You have now to wrap generously the support with synthetic metal, giving it roughly the shape of the bumper. Leave it dry as long as possible, depending of the products specifications.
Fourth step : carve the exact final shape
This step is the most difficult and you must pay attention to work as precisely as possible. You have to remove just enough material as necessary, but not too much ! The pictures of this step were taken before reaching the optimal shape.
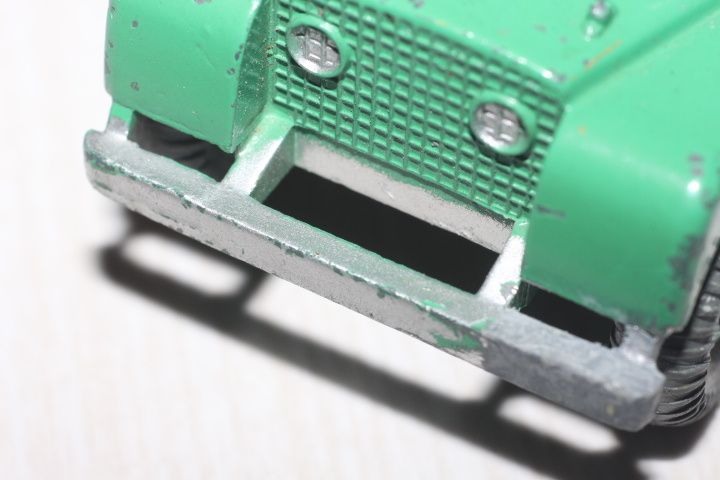
The most difficult part to carve is the part joining the bumper and the wing, which is very very thin. The stepped shape of the underside of the bumper is also not very easy to copy...
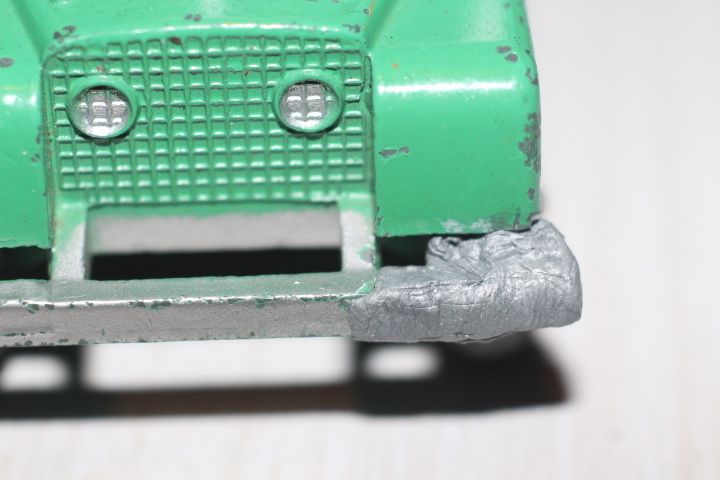
Fifth step : paint the prothesis
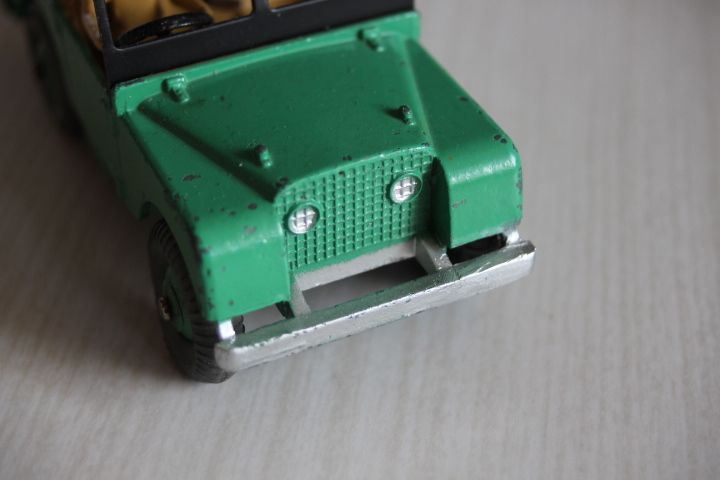
Here again, you need a good feeling or experience to find the right color and brightness of the paint, in order to make a most invisible restoration. I preferred to leave the underside of the prothesis unpainted, in order to make the restoration visible when checking the model. But when the model sits in showcase, you have to look very closely to see the restoration.
The final result...


No comments:
Post a Comment